Introduction
Have you ever ruined a perfectly good t-shirt because you weren’t sure about the right temperature setting? You’re not alone. One of the most common frustrations crafters face when working with heat transfer vinyl is getting those settings just right. That’s exactly where the Cricut heat guide becomes your best friend.
The Cricut heat guide is an essential resource that takes the guesswork out of your heat press projects. Whether you’re working with iron-on vinyl, infusible ink, or other heat transfer materials, knowing the correct temperature and pressure settings can mean the difference between a professional-looking result and a crafting disaster. In this article, you’ll discover everything you need to know about using the Cricut heat guide effectively. We’ll cover temperature basics, material-specific settings, common mistakes to avoid, and practical tips that will transform your heat transfer projects from amateur to amazing.
Understanding the Cricut Heat Guide Basics
The Cricut heat guide is essentially your roadmap to successful heat transfer projects. Think of it as a detailed instruction manual that tells you exactly what temperature, pressure, and time you need for each specific material. Cricut provides this guide both online and through their Design Space app, making it easily accessible whenever you’re working on a project.
You’ll find that the guide organizes information by material type. Each entry includes the recommended heat setting, whether you should use light, medium, or firm pressure, and how long you need to apply heat. Some materials also require specific preparation steps or cooling methods, which the guide clearly outlines.
What makes the Cricut heat guide particularly valuable is its accuracy. Cricut has tested these settings extensively with their own materials and machines. This means you can trust the recommendations and achieve consistent results every time you follow them correctly.
The guide also includes information about whether you need a protective sheet. Some materials require a barrier between your heat source and the material to prevent scorching or melting. Knowing when to use this extra layer is crucial for project success.
Why Temperature Matters in Heat Transfer
Temperature isn’t just a number on your heat press or iron. It’s the critical factor that determines whether your design adheres properly to your base material. Too low, and your vinyl won’t stick. Too high, and you risk melting, scorching, or discoloring your project.
Different materials respond to heat in unique ways. Cotton fabrics can typically handle higher temperatures than polyester blends. Iron-on vinyl has different requirements than infusible ink. Each material has a sweet spot where the adhesive activates perfectly without damaging the fabric or the design.
Your heat source also plays a role in how you interpret temperature settings. A professional heat press provides more consistent and even heat distribution than a home iron. If you’re using an iron, you might need to adjust your approach slightly, applying heat for longer periods or checking your work more frequently.
Room temperature and humidity can affect your results too. On particularly humid days, you might notice that materials take slightly longer to adhere. Being aware of these environmental factors helps you make smart adjustments when needed.
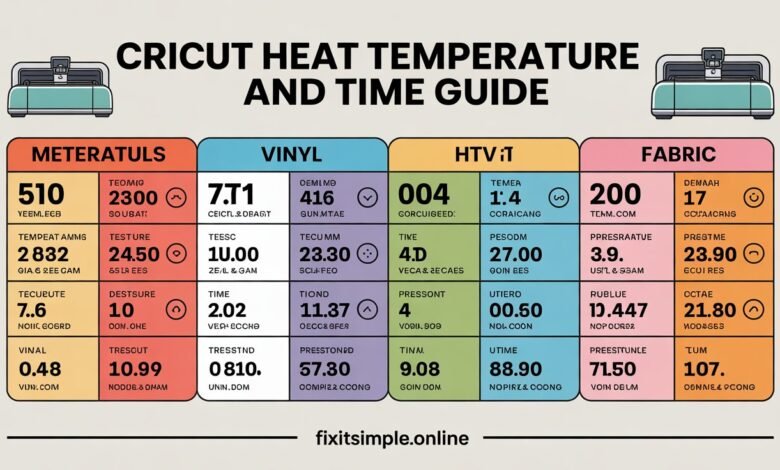
Breaking Down the Cricut Heat Guide Settings
When you look at the Cricut heat guide, you’ll see several key pieces of information for each material. Let me walk you through what each setting means and why it matters for your projects.
The temperature setting is usually given in both Fahrenheit and Celsius. For most Cricut iron-on materials, you’re looking at temperatures between 315°F and 340°F. Premium materials like SportFlex or holographic vinyl might require slightly different settings. Always check the specific recommendation for your material.
Pressure settings describe how firmly you need to press down during application. Light pressure means gentle contact, medium is moderately firm, and firm pressure requires your full strength. Heat presses often have adjustable pressure knobs, while iron users need to gauge this manually.
Time recommendations tell you how long to maintain heat and pressure. Most applications take between 30 seconds and 2 minutes. Longer isn’t always better. Excessive heat exposure can actually weaken the adhesive bond or damage your materials.
The guide also specifies whether you need a cold or warm peel. Cold peel means you wait until the material cools completely before removing the carrier sheet. Warm peel allows you to remove it while the material is still warm but not hot. Following this instruction prevents your design from lifting or stretching.
Material Specific Heat Settings You Need to Know
Let’s dive into the specific settings for popular Cricut materials. Having these numbers at your fingertips will speed up your workflow and improve your results dramatically.
Everyday Iron-On: This versatile material works at 315°F with medium pressure for 30 seconds. You’ll use a cold peel method. It’s perfect for cotton and polyester blends, making it ideal for basic t-shirt projects and fabric crafts.
StrongBond Iron-On: When you need extra durability, StrongBond requires 340°F with firm pressure for 40 seconds. This material also uses cold peel. It’s excellent for items that will see heavy washing or wear, like sportswear or kids’ clothing.
SportFlex Iron-On: Designed for athletic fabrics, SportFlex needs 305°F with medium pressure for 45 seconds using a cold peel method. The lower temperature prevents damage to moisture-wicking materials while still creating a strong bond.
Infusible Ink: This unique material requires 385°F for 40 seconds with firm pressure. You must use compatible blank materials that have a polyester coating. The high heat causes the ink to sublimate and become part of the fabric rather than sitting on top of it.
Foil Iron-On: For that shiny metallic look, foil iron-on needs 315°F with firm pressure for 30 seconds and a cold peel. The firm pressure ensures the foil transfers completely without gaps or missing spots.
Choosing the Right Heat Source for Your Projects
You have several options when it comes to applying heat to your Cricut projects. Each heat source has advantages and limitations that you should understand before starting your work.
The Cricut EasyPress is specifically designed for heat transfer projects. It comes in three sizes and provides consistent, even heat distribution. The digital temperature display takes the guessing out of settings. If you’re serious about heat transfer crafts, investing in an EasyPress will dramatically improve your results and save you time.
Traditional heat presses offer the most professional results for high-volume projects. They provide precise temperature control and consistent pressure across large areas. However, they’re more expensive and take up significant space. For home crafters doing occasional projects, a heat press might be overkill.
A household iron is the most budget-friendly option and many crafters achieve good results with one. You’ll need an iron with adjustable temperature settings and no steam function. The main challenge is maintaining consistent pressure and even heat distribution. You might need to work in sections and press multiple times to cover larger designs.
Whichever heat source you choose, always test your settings on scrap material first. This simple step can save you from ruining your actual project and wasting materials.
Common Mistakes When Using the Cricut Heat Guide
Even experienced crafters sometimes make mistakes with heat settings. Knowing these common pitfalls helps you avoid them and achieve better results consistently.
One frequent error is not preheating your base material. Fabrics often contain moisture or wrinkles that interfere with adhesion. Taking 5 seconds to press your blank shirt or fabric removes moisture and creates a smooth surface. This simple step significantly improves how well your design adheres.
Another mistake is ignoring the fabric content of your base material. The Cricut heat guide provides settings based on material composition. A 100% cotton shirt requires different settings than a 50/50 cotton-poly blend. Always check your fabric labels and adjust accordingly.
Rushing the cooling process causes countless ruined projects. When a material requires cold peel, you must wait until it’s completely cool to touch. Removing the carrier sheet too early can lift your design or cause it to stretch and distort.
Using worn out or dirty carrier sheets affects heat transfer too. The carrier sheet protects your design during application, but old sheets with residue or damage don’t work effectively. Replace carrier sheets regularly for best results.
Troubleshooting Heat Transfer Problems
Sometimes things don’t go as planned. Here’s how to diagnose and fix common heat transfer issues you might encounter.
If your vinyl isn’t sticking properly, temperature is usually the culprit. Try increasing your heat by 5-10 degrees and extending your press time by 5-10 seconds. Make sure you’re using adequate pressure throughout the entire design area.
Scorching or melting happens when temperatures are too high. Reduce your heat setting by 10-15 degrees for your next attempt. If you’re working with delicate fabrics or thin materials, consider placing a thin cotton cloth between your heat source and the project as an extra protective layer.
When you notice your design has a texture that shows through the vinyl, you might not be using enough pressure. Firm pressure ensures the adhesive melts evenly and creates a smooth finish. For iron users, this means bearing down with significant force during application.
Designs that peel or lift after washing typically weren’t given adequate initial bonding time or temperature. Go back over problem areas with your heat source following the recommended settings. Sometimes a second application resolves adhesion issues.
Tips for Perfect Heat Transfer Every Time
After working with countless heat transfer projects, I’ve learned some tricks that consistently produce professional results. These tips complement the official Cricut heat guide recommendations.
Always create a test piece before working on your final project. Cut a small version of your design and apply it to scrap material that matches your actual base fabric. This test run confirms your settings work correctly and saves you from potential disappointment.
Keep your work surface completely flat and stable. Any unevenness in your pressing surface creates inconsistent pressure distribution. This leads to partial adhesion where some areas stick perfectly while others don’t bond at all.
Work in a well-ventilated area, especially when using materials that require high heat. Some materials release fumes during application. Opening windows or using a fan ensures you’re not breathing in any potentially irritating vapors.
Mark your temperature settings for frequently used materials. Keep a notebook or use the notes app on your phone to record what worked well. Include details like fabric type, material used, and any adjustments you made. This personal reference guide becomes invaluable over time.
Advanced Techniques Using the Heat Guide
Once you’ve mastered basic heat transfer, you can explore more advanced techniques that create stunning, professional-quality projects.
Layering different materials requires careful attention to heat settings. When combining multiple types of iron-on vinyl, apply them one layer at a time using the highest temperature requirement. The cooler materials won’t be damaged by the higher heat, but starting with lower temperatures might not adequately bond the hotter materials.
Creating ombre or gradient effects involves strategic heating and cooling. You can achieve beautiful color transitions by partially applying heat to create intentional variations in adhesion. This technique requires practice but produces unique, eye-catching results.
Working with textured fabrics like canvas or denim needs extra consideration. These materials often require longer press times and firmer pressure because the texture creates air pockets. Extending your application time by 10-15 seconds helps ensure complete adhesion across the entire design.
Mixing infusible ink with traditional iron-on creates interesting mixed-media effects. Remember that infusible ink requires much higher heat, so you’ll need to plan your layering carefully and use protective sheets to prevent damage to previously applied materials.
Maintaining Your Equipment for Consistent Results
Your heat source and tools need proper care to maintain accurate temperature control and even heat distribution. Regular maintenance ensures your Cricut heat guide recommendations work as intended.
Clean your heat press or EasyPress surface regularly. Adhesive residue builds up over time and creates hot spots or prevents even heat transfer. Use a damp cloth while the surface is slightly warm to wipe away any buildup. Never use abrasive cleaners that might damage the coating.
Calibrate your equipment periodically. Even quality heat presses can drift slightly from their displayed temperature over time. An inexpensive infrared thermometer lets you verify your actual surface temperature matches the display. Make note of any discrepancies and adjust your settings accordingly.
Replace protective sheets and mats when they show wear. Scorched or melted protective sheets no longer provide adequate protection. Worn mats with compressed padding don’t create even pressure distribution. These replacements are inexpensive compared to ruined projects.
Store your materials properly to maintain their heat transfer properties. Keep iron-on vinyl away from direct sunlight and extreme temperatures. Store materials in their original packaging or airtight containers. Properly stored materials maintain their adhesive properties and transfer quality much longer.
Adapting Settings for Different Fabrics
The Cricut heat guide provides excellent baseline settings, but different fabric types sometimes need slight adjustments for optimal results.
Cotton fabrics handle heat extremely well and typically work perfectly with standard settings. You have more flexibility with cotton, which makes it the ideal fabric for beginners. Pure cotton can handle temperatures on the higher end of recommended ranges without damage.
Polyester requires more caution because it’s sensitive to high heat. Lower your temperature by 10-15 degrees when working with 100% polyester. Watch carefully for any puckering or shininess that indicates the fabric is getting too hot. Quick, gentle applications work better than prolonged pressure.
Blended fabrics require a balanced approach. For 50/50 cotton-poly blends, stick closely to the guide’s recommendations. For other blend ratios, adjust slightly toward the predominant fiber’s requirements. When in doubt, start with lower heat and increase if needed.
Delicate fabrics like silk or rayon need special attention. Use the lowest recommended temperature and always use a protective pressing cloth. Test on an inconspicuous area first because these materials can be unforgiving if you get the settings wrong.
Creating a Personal Heat Reference Guide
While the official Cricut heat guide is invaluable, creating your own personalized reference makes your crafting more efficient and consistent.
Document every project you complete. Note the material type, base fabric, temperature used, pressure level, and time. Include whether you followed the guide exactly or made adjustments. This record becomes your personal database of successful settings.
Photograph your test pieces and finished projects. Visual references help you remember what worked well and what didn’t. You can also share these references with crafting friends or online communities to help others troubleshoot their projects.
Keep fabric swatches from your projects attached to your notes. When you find a new fabric type you love, staple a small piece to your reference guide along with the settings that worked perfectly. This tactile reference prevents confusion when you purchase similar fabrics later.
Update your guide regularly as Cricut releases new materials. The company frequently introduces innovative products with unique requirements. Staying current ensures you’re always using the best possible settings for optimal results.
Conclusion
Mastering the Cricut heat guide transforms your crafting experience from frustrating trial and error to confident, professional-quality results. By understanding temperature requirements, pressure settings, and timing for different materials, you eliminate the guesswork that causes so many ruined projects.
Remember that the guide is your foundation, but experience builds your expertise. Each project teaches you something new about how materials respond to heat and pressure. Don’t be afraid to experiment with test pieces, document what works, and adjust settings based on your specific equipment and environment.
The time you invest in learning these settings pays off every single time you create a project. You’ll work faster, waste less material, and achieve results that make you proud. Your heat transfer projects will look professional, last longer, and showcase your creative vision perfectly.
What’s your biggest challenge when working with heat transfer materials? Start with the basics we’ve covered here, and you’ll soon discover that perfect heat application becomes second nature.
FAQs
What temperature should I use for regular Cricut iron-on vinyl? Most standard Cricut iron-on materials work best at 315°F with medium pressure for 30 seconds. Always verify the specific recommendation in the heat guide for your exact material, as specialty iron-ons may have different requirements.
Can I use a regular household iron instead of a heat press? Yes, you can achieve good results with a household iron set to the appropriate temperature without steam. You’ll need to apply firm, even pressure and may need to press longer or in sections compared to using a dedicated heat press.
Why is my vinyl peeling after washing? Peeling usually results from insufficient heat, pressure, or time during application. It can also happen if you remove the carrier sheet before the material cools completely. Try reapplying heat to problem areas or increasing your initial press time.
Do different fabric types require different heat settings? Absolutely. Cotton handles higher heat well, while polyester needs lower temperatures to avoid melting. Blended fabrics require settings that balance both fiber types. Always check your fabric content before selecting temperature settings.
How long should I wait before peeling the carrier sheet? This depends on your material. Cold peel materials must cool completely to room temperature before removing the carrier sheet. Warm peel materials can have the sheet removed while still warm but not hot. Check the Cricut heat guide for your specific material.
What does pressure mean in heat transfer? Pressure refers to how firmly you press down during application. Light pressure is gentle contact, medium is moderately firm, and firm pressure requires your full strength. Adequate pressure ensures the adhesive bonds completely to your base material.
Can I layer different types of Cricut iron-on? Yes, you can layer different iron-on materials. Apply them one at a time, starting with the layer that requires the highest temperature. Use a protective sheet between layers when applying additional heat to previously applied designs.
Why does my design look shiny or melted? This indicates your temperature was too high for your base fabric. Reduce your heat setting by 10-15 degrees and try again. Use a protective pressing cloth for delicate fabrics to prevent direct heat damage.
How do I know if my heat press temperature is accurate? Use an infrared thermometer to check your actual surface temperature against the display reading. Temperature accuracy can drift over time, especially with frequent use. Regular calibration checks ensure consistent results.
What’s the difference between Infusible Ink and regular iron-on? Infusible Ink requires much higher heat (385°F) and only works on polyester or poly-coated surfaces. The ink actually becomes part of the material through sublimation rather than sitting on top like traditional iron-on vinyl does.
Also read fixitsimple.online